Encountering technical glitches while running the software is quite a common problem. “QuickBooks Install Diagnostic Tool” is one such versatile tool that is specially designed and developed to diagnose and repair the technical glitches that may arise while installing the QuickBooks application. So, in case you are facing any installation-related issues, the QuickBooks install diagnostic tool is effectively helpful to resolve the problem.
Developed by Intuit the tool is designed to address errors that may occur during the installation or when opening QuickBooks Desktop. In this article, we will explore the various features and benefits of the QuickBooks diagnostic tool to assist you in troubleshooting any issues that may arise during the installation process. Please take the time to carefully read the blog to fully grasp the significance of this exceptional tool. Furthermore, we have included detailed instructions below to assist you in effortlessly downloading, installing, and utilizing this tool to effectively address any future installation errors.

Short Summary on QuickBooks Install Diagnostic Tool
The QuickBooks Install Diagnostic Tool, created by Intuit, is designed to efficiently resolve any installation errors that may occur while using the QB application. This tool is essential for identifying and fixing errors through a thorough scanning process, ensuring the smooth operation of the software.
The QuickBooks diagnostic tool is specifically designed to assist users of QB account software in efficiently identifying and resolving errors, saving both time and money. When encountering errors during installation, this tool acts as a reliable solution to quickly troubleshoot and eliminate any issues, ensuring a smooth software experience.
In addition to resolving installation errors, the QuickBooks Desktop Install Diagnostic Tool can also help fix issues such as QuickBooks not working, error code H303, incorrect license data problems, .NET Framework errors, and more. Scroll down for further details.
List of Errors Resolved by QuickBooks Desktop Install Diagnostic Tool
It’s crucial to familiarize yourself with the various errors that the QuickBooks desktop install diagnostic tool can resolve before proceeding with the download. To help you better understand, we have compiled a comprehensive list of these errors for your reference. Please review them to ensure that your software continues to function smoothly in the future.
QuickBooks Error Code 6123: Multi-user environments may encounter this issue when there is a disruption in the connection between QuickBooks and the company file. It is critical to troubleshoot and resolve this problem to ensure the software’s smooth operation for all users.
QuickBooks Error Code H303: QuickBooks may encounter this error if the software fails to identify the IP address of the computer storing the company file or if the ND file becomes corrupted. Another possible cause could be a damaged hosting configuration. To resolve this issue, you can use the QuickBooks desktop install diagnostic tool.
QuickBooks Error Code 2203: Error code 2203 may pop up if the user lacks sufficient permissions to install the software in the designated folders. Make sure to log in as an administrator to successfully install applications on your computer.
C++ Related Errors: Runtime errors in C++ can occur during the payroll configuration process, when conducting payroll audits, or when sending out pay stubs via email. These errors may also be triggered by a software crash.
The QuickBooks has Stopped Working Error:- QuickBooks users may encounter an error when trying to open the QB Desktop, leading to a frozen screen that does not respond to any commands. A message often indicates that QB has stopped operating or is unresponsive. Potentially due to a broken, corrupted, or missing QBWUSER.INI file or a damaged hard drive. If you are experiencing this problem, it is recommended to troubleshoot the issue by running the QuickBooks install diagnostic tool.
.NET Framework Errors: The Windows operating system comes equipped with a variety of versions of the NET Framework. If you encounter errors related to the .NET Framework, running a system file checker can help restore any corrupted system files and potentially resolve these issues.
MSXML Damage: A very important set of tools called MSXML Core Services allows programs to make XML-based programs on Windows. It is important to ensure the proper functioning of MSXML, as any issues with this component can impact QuickBooks Desktop’s performance.
QuickBook Error H101: When attempting to access company files on a computer without proper setup or necessary configurations, the QuickBooks error code H101 may appear. Hosting settings related to the H series errors typically cause this error. Such as one or more computers fail to function as the QuickBooks server.
QuickBooks error C55, 64: A network issue, such as a temporary outage or a network crash, may have triggered the QuickBooks error code C 55, 64, leading to locked QB files. This can prevent users from accessing their data and may require troubleshooting to resolve the issue promptly.
There are numerous errors that can be resolved by running the install diagnostic tool in QuickBooks, including QuickBooks error 1935, Unrecoverable error in QuickBooks desktop, QuickBooks error code 1335, QB error code 1904, QuickBooks error 3371, and many more. To fix these errors, you need to download and install the diagnostic tool correctly in your software. Keep reading for instructions on how to proceed with the downloading process.
Steps to Download the Install Diagnostic Tool in QuickBooks
Before proceeding with the installation of the diagnostic tool in QuickBooks, it is essential to ensure that you have completed the necessary steps. By following these instructions, you can ensure a seamless and efficient installation process for the diagnostic tool.
- Close down all the applications that are running in the background.
- To access the tool, close the files.
- Running the scanning process will automatically diagnose the issues and resolve them.
- If the tool shows the message “No errors were detected,” it means that the issue remains unfixed.
Step 1: Download the QuickBooks program
Now that you have taken note of the previous steps, you can proceed with installing the diagnostic tool for your software. Carefully follow the instructions provided below to ensure a successful installation and optimal results.
- To begin the process, download the QuickBooks install diagnostic tool from Intuit’s official website.
- Now, save the downloaded file on your desktop.
- Please wait until the download process is complete.
- Then, launch the folder and hit right-click on the QuickBooksDesktoplnstallDiagnosticTool.exe file.
- Click on the Run tab.
- Hit the Yes option to accept the terms and conditions.
- At last, restart the system.
Factors to be Noted for the QuickBooks Program Diagnostic Tool
The QuickBooks diagnostic tool installs and scans the specific file that requires a diagnosis to fix the error. However, understanding the process necessitates understanding the conditions under which it operates. Below, we have compiled several factors that caused the installation error in QB:
Verify the Compatibility: Utilize the connection tab to identify any errors, as it facilitates a comprehensive system scan. This tab helps set up the data in the company file in QuickBooks.
The Firewall settings: Sometimes, the installed firewall on your system does not allow users to install any new files. Therefore, the firewall may be the cause of any errors that occur during the QB installation process. This tool helps users check the status of the firewall through the scanning process. If the tool detects an error in the firewall system, it will quickly diagnose it automatically.
Network Connectivity: Just like the firewall, low network connectivity will also be a major factor in errors occurring during the installation of QuickBooks on the system. The QB diagnostic tool will detect low network connectivity with the workstation during the scan.
How to Use the Install Diagnostic Tool in QuickBooks?
Once you’ve completed the installation process, it’s time to understand how to use it effectively. Below, we have provided your complete step-by-step instructions. Please follow the same to get the best possible action:
- To start the process, the user first has to navigate to the QB Diagnostic Tool.
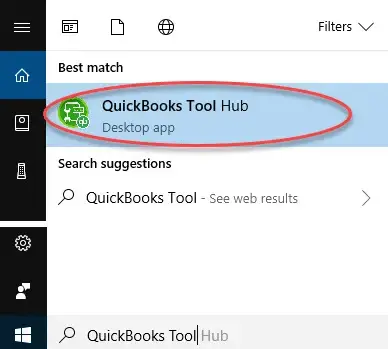
- If you don’t find the tool on your system, you can go to the menu bar from the search field and hit the Enter button.
- The new page prompt appears in the Menu bar.
- Go to the QuickBooks Install Diagnostic Tool, and click on it to open it.
- Once the tool opens, you have to navigate to the specific section according to the issue you are facing.
- After navigating to that particular section, the scanning process will start detecting the issue on your system and resolving it.
- When the diagnosis process is complete, just restart the device. Also make sure all the vital components for the QB are updated.
How to Run the Install Diagnostic Tool using QuickBooks Tool Hub?
The users have another option to run the QuickBooks desktop install diagnostic tool with the help of the QuickBooks Tool Hub. Generally, this method is useful for those users who prefer to have a centralized application for resolving all QB-related errors. Below are the steps that will help you run the tool using Tool Hub.
- Close down the QuickBooks software on your workstation.
- Now, visit the official website of Intuit and download the latest version of QuickBooks Tool Hub.
- Once the downloading process is complete, locate the download file on your computer and open it.
- Then, start installing the application by following the on-screen instructions.
- Go to the PC Desktop screen and double-click on the QB Tool Hub icon.
- Next, the license agreement window will appear on your screen.
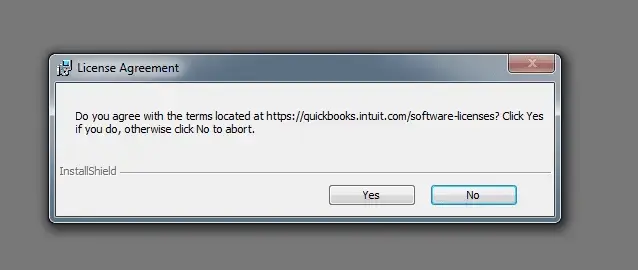
- Hit the Yes tab, and the tool hub will appear on screen.
- Click on the Installation Issues option.
- As a result, you will be able to see the QuickBooks Install Diagnostic Tool option in the green color box.
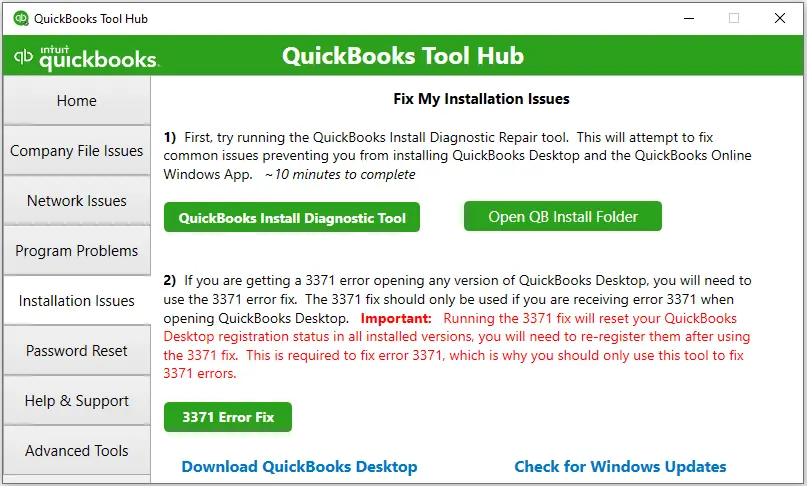
- Click it, and the tool will automatically run the repair process on your device.
- This process might take some time, depending on the size of the company file.
- By implementing the above-listed steps, you have successfully run the QuickBooks Install Diagnostic Tool on your PC through the QB tool hub. This must have resolved the installation issues that you might be experiencing while installing the software.
Conclusion!
We believe that this blog helps you understand the installation process and how to run this QuickBooks diagnostic tool. This magical tool is crucial for troubleshooting and resolving multiple software and hardware issues, ensuring optimal system performance. Its user-friendly interface and detailed diagnostic capabilities make it an indispensable asset for both professionals and enthusiasts alike. It is important to leverage such tools to maintain a healthy computing environment. In case you found this content helpful, we recommend you explore our other blogs. Which will help you enhance your knowledge further and stay updated with the latest advancements in the tech world.
Mike Jason is a seasoned financial advisor and certified QuickBooks expert with over 15 years of experience. He enjoys sharing his insights and knowledge by writing articles and content on a variety of topics. He is passionate about helping individuals and businesses achieve their financial goals by helping them use accounting software smoothly and efficiently, helping them make better-informed decisions for long-term success.